How To Install Playground Border
This easy to install playground border is safe, strong, and budget friendly.
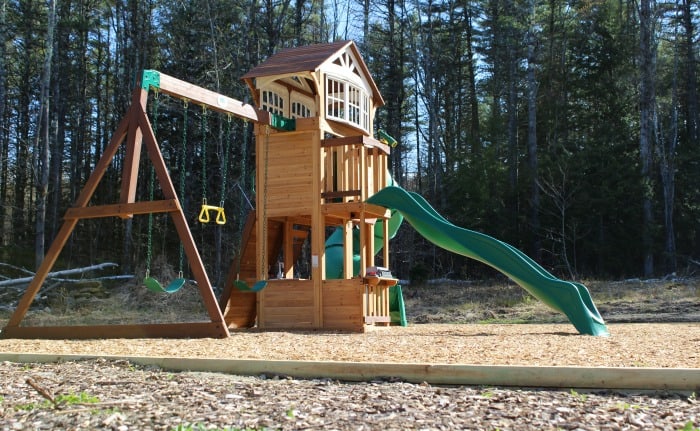
Best Material for a Playground Border
Back when I was landscaping peoples homes, I was shocked at how many customers asked me to install playground areas for them.
After pricing myself out of a couple of jobs I realized I needed to be more creative.
The main thing driving up the cost was always the border material. I priced out jobs using recycled rubber borders, plastic borders, and also composite borders. All these materials drove the cost way up.
Finally, when walking around a local Home Depot I found the solution. Landscape timbers!
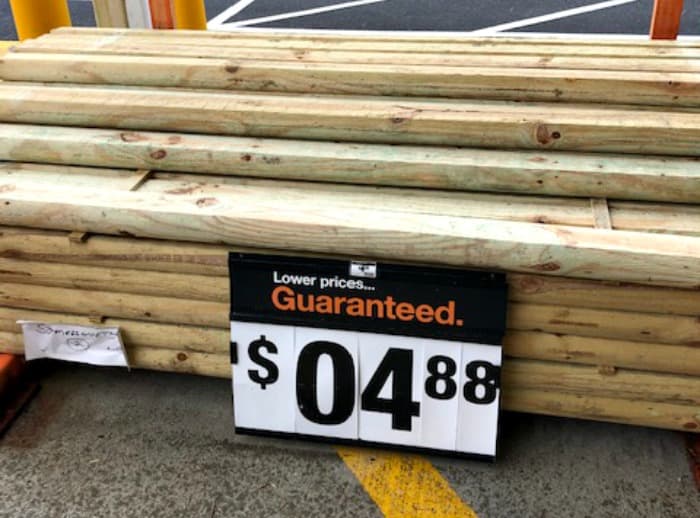
They are safe, affordable, look good, and accessible since most big box stores and lumber companies have them in stock.
Once I found my new go to material I developed a simple installation system to go with it.
About This Playground Border System
This system uses 2 rows of landscape timbers stacked on top of each other. For added strength and stabilization, each timber is drilled so rebar pins can be hammered through the timber and into the ground.
This system also uses 4×4 pressure treated posts on all 4 corners. These corner posts serve 2 purposes. First, it's an additional anchor since the posts are dug into the ground.
Second, it's better aesthetically. Since the timbers have curved sides, they aren't able to butt tightly up to each other.
Using the 4×4 posts as a stopping point makes a cleaner looking finish in the corners.
Playground Border Installation Steps
1. Purchase Materials:
The amount of each material you purchase will vary depending on the size of your border.
-Landscape timbers
-4×4 pressure treated post,
-1/2" rebar 2′ long (2 per landscape timber)
-4" exterior screws
-3" exterior screws
-Exterior PL glue
-1×2's for stakes and batter boards
-String for layout
Tools Needed:
-Shovel
-Metal Rake
-Level
-Drill
-3/4" Speedbor (for drilling the holes for the 1/2" rebar)
-Tape Measure
-Post Hole Digger (can use shovel instead)
-Miter Saw (can use skill saw instead)
-Framing Square
2. Rough Layout and Prep
Choose a place in your yard that's fairly level.
Using a tape measure, measure out, and mark the 4 corners of your playground border with a stake. This is a rough measurement, you're not looking to get perfectly square yet, just do your best to eye up a square shape.
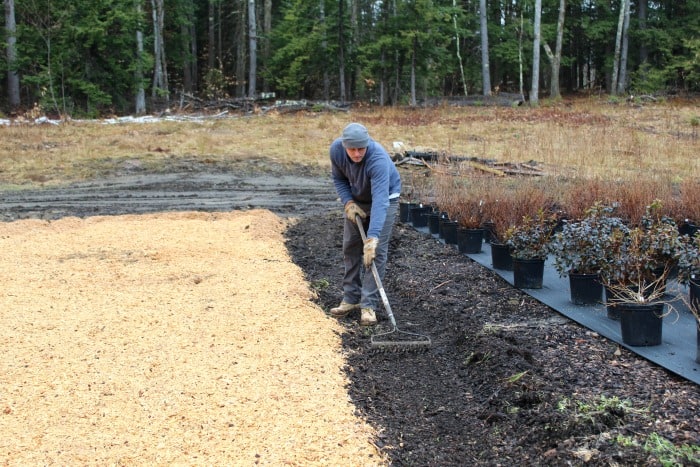
Start doing some rough grading and preparation of the area using shovels and rakes. If you have lawn in this area then you will want to remove it. You'll notice in the pic below I chose a place right next to my backyard plant nursery.
3. Set Up Batter Boards
It's time to take your rough layout and square it up. This means that all the angles in the corners will be 90 degrees. This is important. If you're not square then you're border isn't going to line up in the corners.
The best way to square your layout is to use batter boards. Batter boards are temporary frames on all four corners of your layout. These frames are where you place string, so you can make adjustments until you have a square.
Make your batter boards using your 1×2's. I like to cut them so they're about 2′ in length. You'll need two vertical pieces and a horizontal piece to make on set of batter boards. Every corner will require to sets, so you'll need a total of 8 batter board sets.
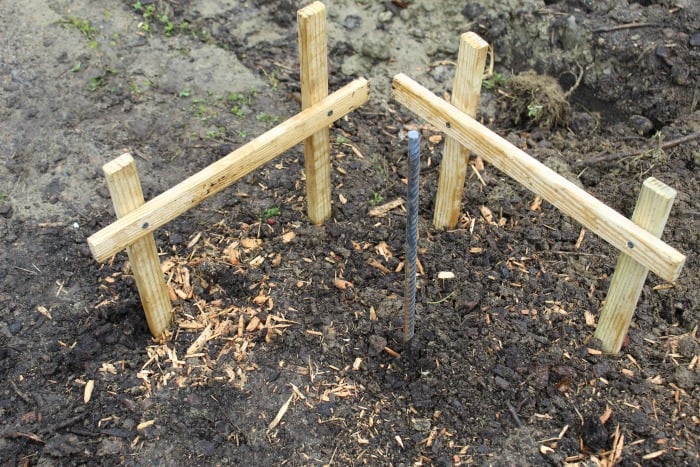
The pic above is what a typical corner should look like. That rebar in the middle is from my rough measurement. We know that the rough measurement isn't perfect so the batter boards are going to give us plenty of room to make adjustments.
Also notice that the batter boards are set at least a foot outside of the actual dimensions of the playground border.
4. Make Square
Once you have all your batter boards up surrounding your general corner locations, it's time to square your angles. Just keep in mind, you are only squaring off in this step, not leveling the lines. Leveling will be done later on.
A. Pick 1 side as your starting point. If you're making a rectangle then your first side should be 1 of the 2 longer sides.
String a line on the 2 batter board sets to mark this side of your border. As you go through the squaring process this side doesn't get touched, this is your fixed side.
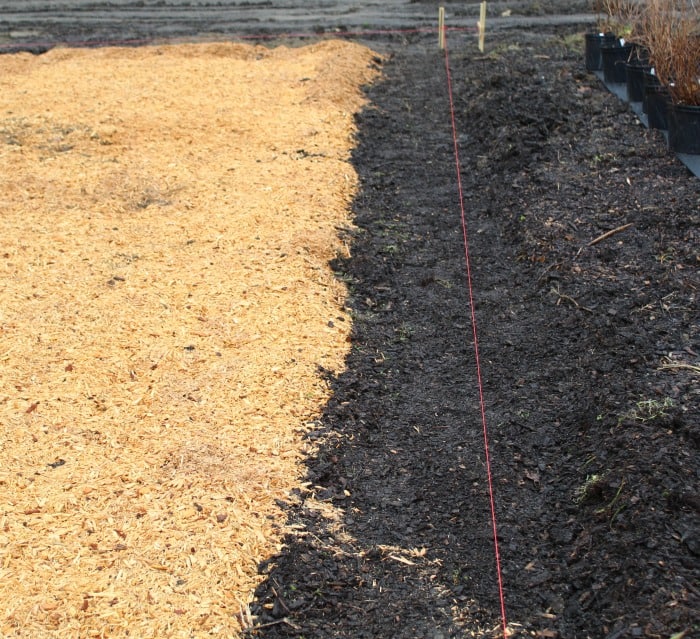
B. Now you want to layout the opposite side of your fixed side. This will leave you with 2 parallel lines. Simply measure from your fixed line the distance that you want to make your width.
For example, if your playground is 25 x 15, go to one end of your fixed line and measure 15′ and mark the location on the batter boards opposite that line.
Go to the other end of your fixed line and mark 15′ from that end as well. String a line between the 2 marks you made on the batter boards. At this point you should have 2 parallel lines 15′ apart (your fixed line and the line opposite that).
C. Now it's time to layout the third side of your border. Pick 1 of the remaining sides and string a line in between the 2 batter boards. You want this line to intersect your 2 parallel lines making a 90 degree angle. Just eye it up to get your string on the batter boards.
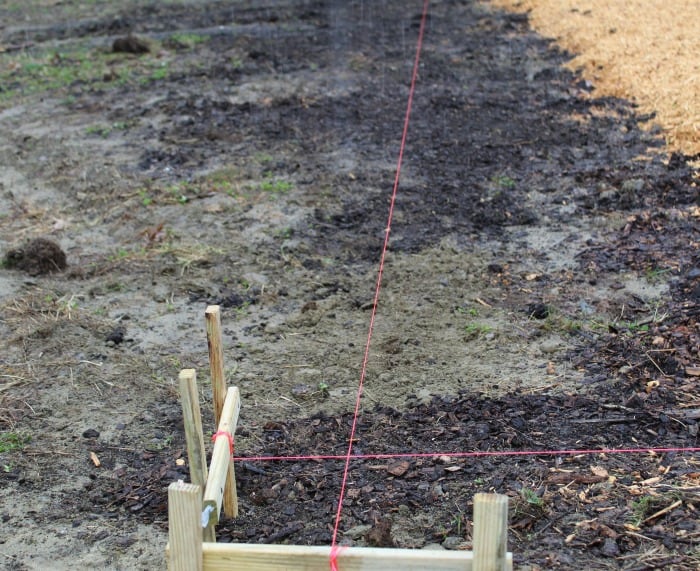
Then, take the framing square and make adjustments based off the square. Don't adjust your parallel lines, keep those set. Instead you want to adjust the third side that you just eyed up.
Square off both ends of this third side using the framing square.
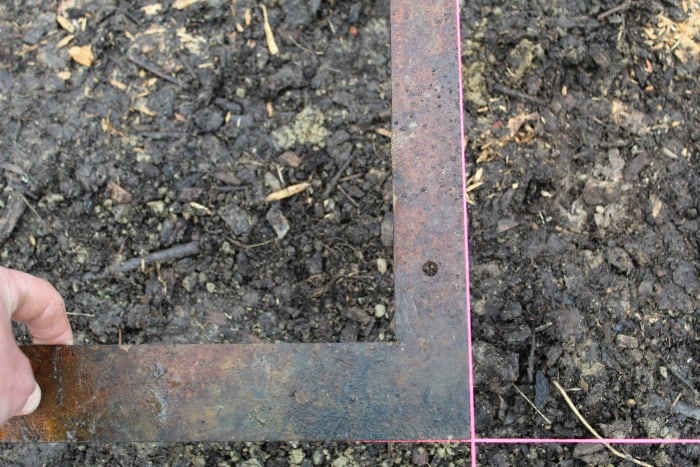
D. Once you have line 3 square, measure over to make a parallel line to line 3. In the example we've been using, you would measure over 25′ from both ends of line 3 and mark your batter boards. Then, string your line. This is line 4.
Repeat the same steps for squaring off line 4 as you did in line 3.
Finally, when you think you have all sides square, measure the diagonals to see if they are equal. Diagonal A should be the same measurement as Diagonal B. Take a look this drawing for an example: Squaring with Diagonals
If they aren't equal then make adjustments but only to lines 3 and 4.
5. Dig Corners
Before digging for your corner posts, it's important to go around and place a stake where your line is set at each batter board. These stakes will be used for leveling after digging our posts.
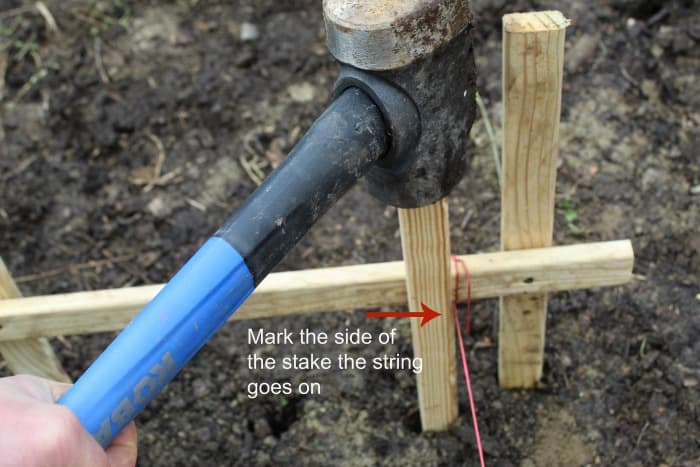
Once all your leveling stakes are in, place a screw or some other marker to mark the location of each corner. This is where you are going to dig for your posts.
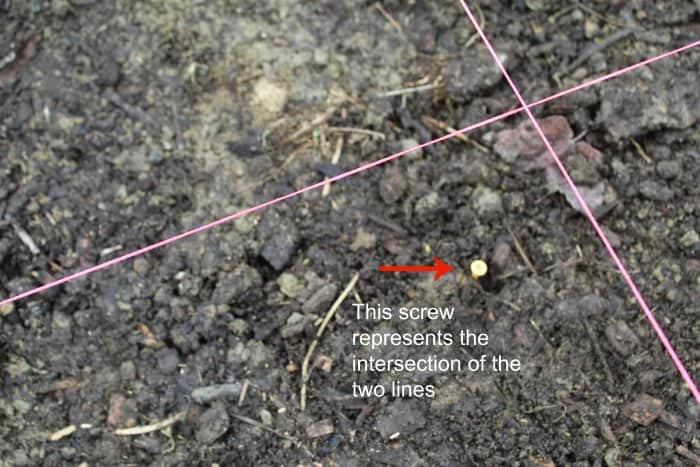
Next, remove the strings and dig the posts using a post hole digger or a shovel. Dig down about 16".

6. Make Level
You want to make this playground border as level as possible. It's OK to put 1/4" per foot of pitch, maybe even a little more.
To begin leveling, start with the side that's the lowest. This will be the side where the most of your border will be exposed.
Since these landscape timbers are 2 1/4" thick and you are using 2 rows, measure 4 1/2" from the ground and mark your leveling stakes on this low side of the playground border.
Put a level to this line.
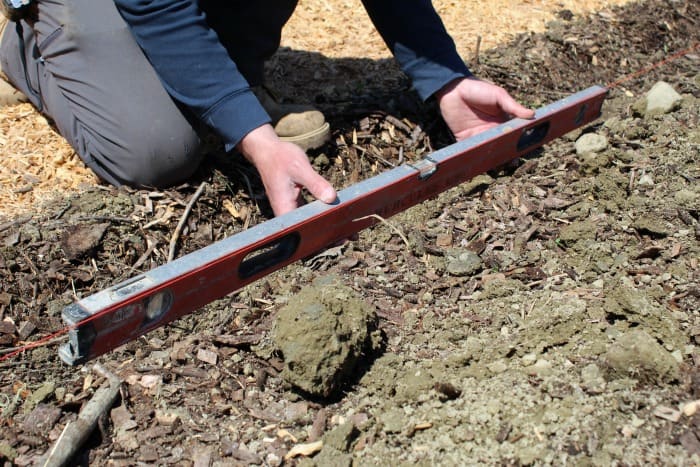
Make adjustments to the line until it is level or slightly pitched in the direction you want. Once this line is level pick one of the sides next to it and follow the same process.
Don't worry if in some sections your line is close to the ground. It's perfectly fine if sections of your border are in the ground. It will actually make it stronger.
Continue leveling the other sides.
7. Drill Holes for Rebar
Now that your layout is square and level, it's time to drill holes for the rebar in your first row of timbers. Figure out how many timbers will be making up your first row, and mark each timber 2′ from both ends.
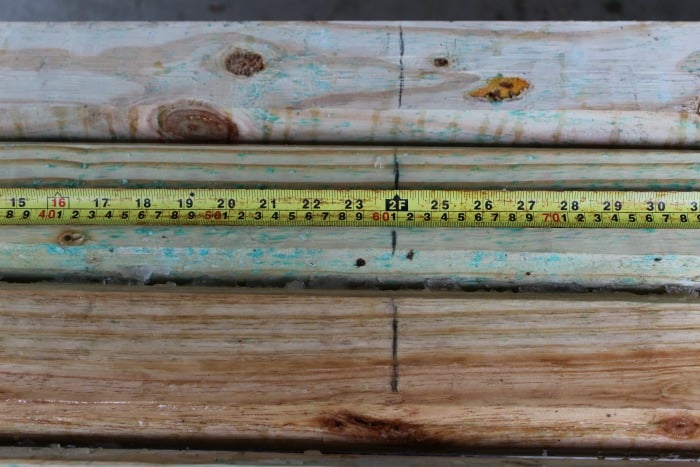
Once you have lines marking 2′ from both ends, place a mark in the middle of each line.
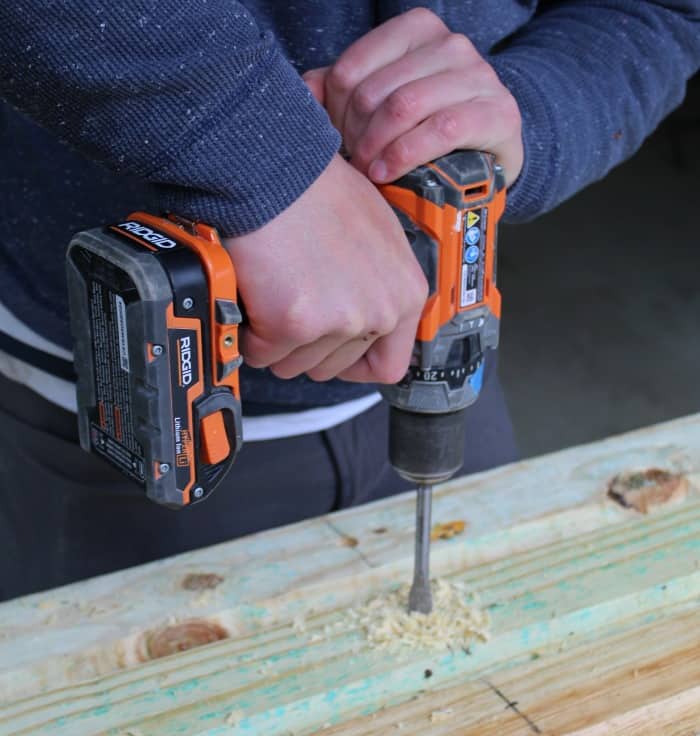
Using your 3/4" speedbor and drill, drill all the way through the timbers at the marked locations. You should have a total of 2 holes per timber.
8. Cut 4×4 Corner Posts
Using a miter saw, or skill saw, cut a total of 4, 16" pieces from your 4×4 post. Once cut, measure 3/4" down from one end. You want your 4×4 to be 3/4" above your landscape timbers.
9. Lay the First Row
Starting at your lowest section, lay the first row on the ground. See how it looks and make adjustments to make level.
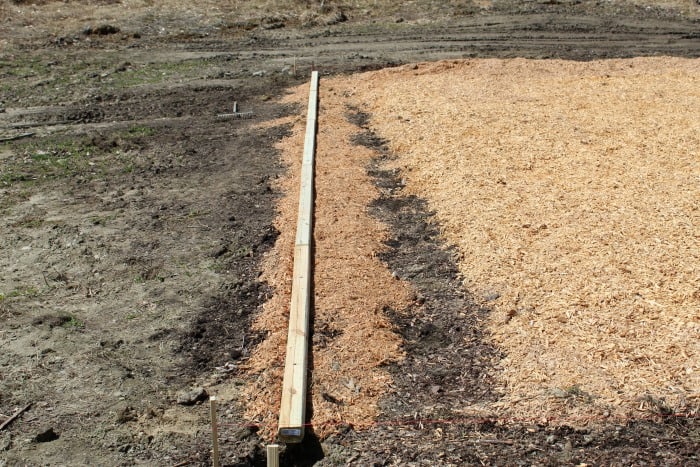
10. Install First Corner Post
Start at one end and put the first corner post in. When installing the corner measure down so that when the 2 courses are installed it will be flush with your line that is 3/4" down from the top.
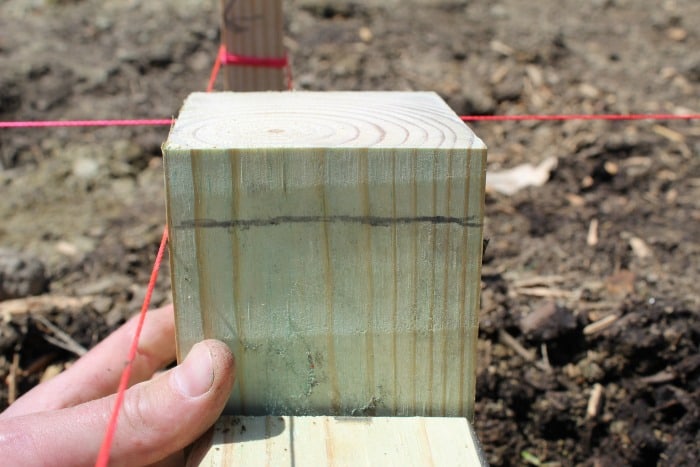
Using the 3" screws, fasten the first timber to the post.
11. Continue Laying First Course
Attach each timber using the 3" screws.
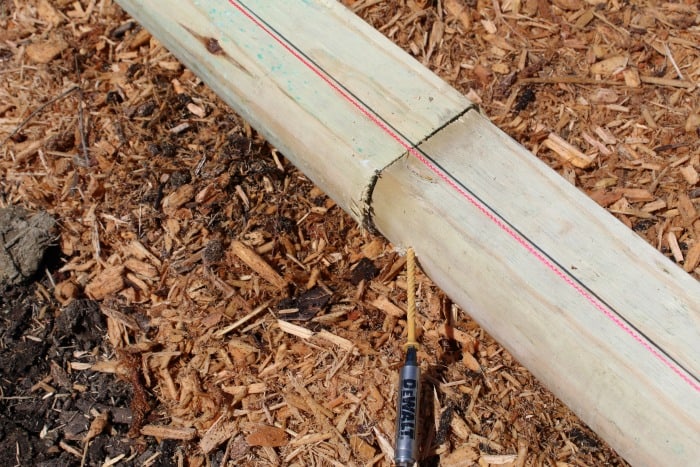
Install the rebar pins as you go using a hammer or sledge hammer. Make sure you leave 1" of the rebar exposed at the top of the timber.
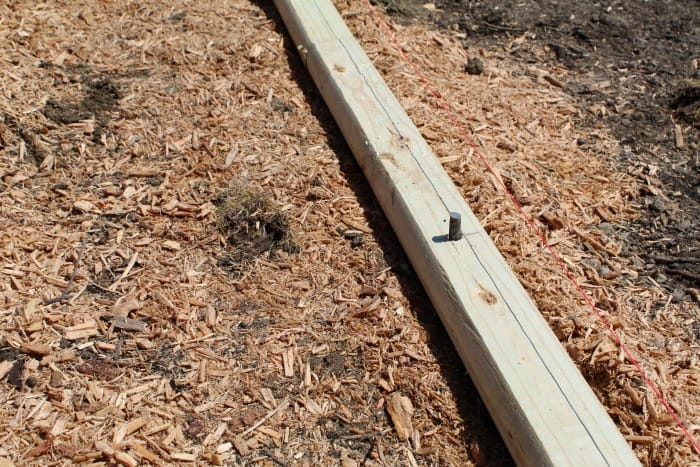
When you get to the end of the first row on your first side, cut the last timber if necessary (depending on the size of your border) and install the last corner post to complete the first row of that side.
13. Start Second Row
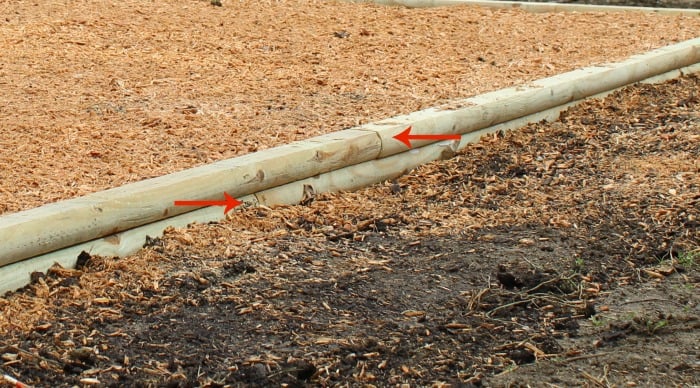
The trick to the second row is make sure you stagger your seems as much as possible. In other words, if you lay an 8′ piece of timber on top of an 8′ piece of timber, your ends will line up. You don't want this.
Your border will be much stronger if your seems are staggered. So if you finished your first row with a cut piece then just start on the second row on the cut end and use a full piece on top. Take a look at how the seems are staggered in the picture below.
14. Drill Rebar Pins for Second Row
Lay out each section of timber on top of the first row. Measure the location of the rebar pin.
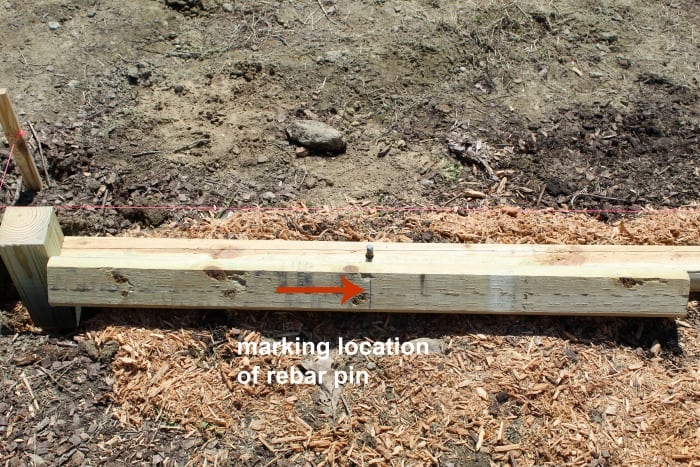
Next, using your speedbor and drill, drill these marked locations as you continue laying the second course. Do not drill all the way through! This time you are only drilling into the timber about 1.5". This way the pin is buried in the middle of the timber.
Also, rotate the drill back and forth when drilling these second course holes. This will make the hole bigger and easier to fit the rebar pin in.
15. Lock In Second Row
Apply PL Glue on top of the first row.

Place the second row on top of the first and continue screwing each timber together. Also, using the 4" screws, screw from the top of the second course timbers all the way through, down into the first course.
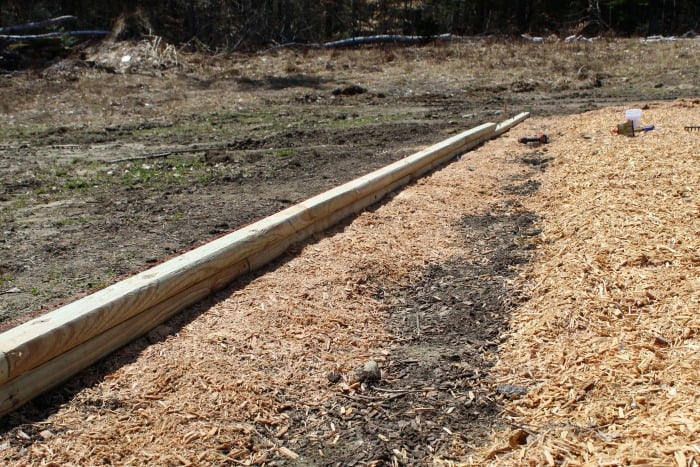
16. Continue Installation
Continue installing the playground border one side at a time. Take your time and make adjustments as needed. Use your string as a guide to keep square and level.
17. Sand or Cap Corners
For your 4×4 corners, consider purchasing a pressure treated cap.You can install this cap using PL Glue.
If you don't want to use a cap, you can simply sand the edges.
18. Rake Smooth
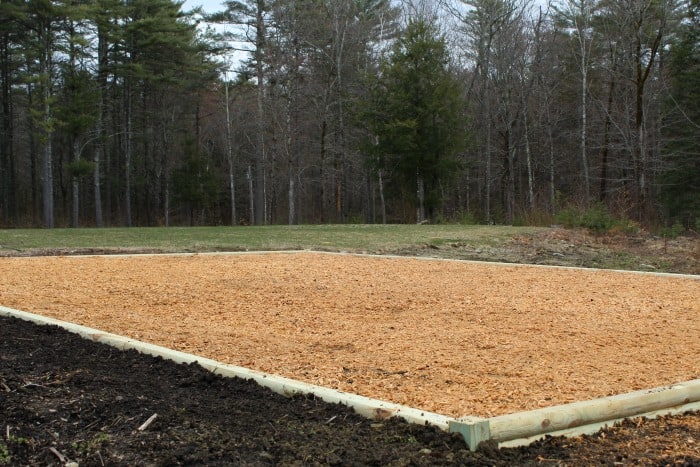
Once your playground border is installed rake the inside and outside smooth. Clean up any rocks or debris that was turned over during construction. By now you should have a level, square area, ready for a playground.
Check Out These PostsNext
When to Cut Back Perennials
When to Prune Hydrangeas
When to Prune Shrubs
Fall Gardening: Tips and Maintenance
Beautiful Shade Garden Ideas
Protecting Evergreens from Winter Burn
Follow Me
Join my free email list!
Plus, follow me on Facebook, Instagram, and Pinterest.
How To Install Playground Border
Source: https://plantforsuccess.com/playground-border/
Posted by: rowlandimation.blogspot.com

0 Response to "How To Install Playground Border"
Post a Comment